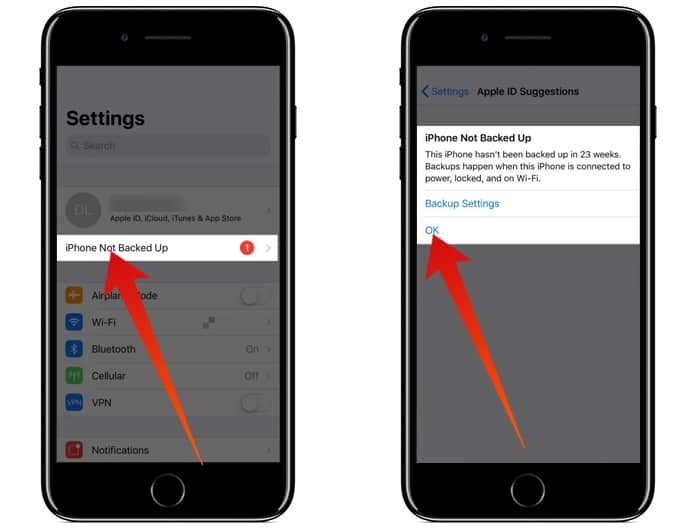
Enable, One Handed Keyboard on iPhone Missing or Not Working: iOS 12
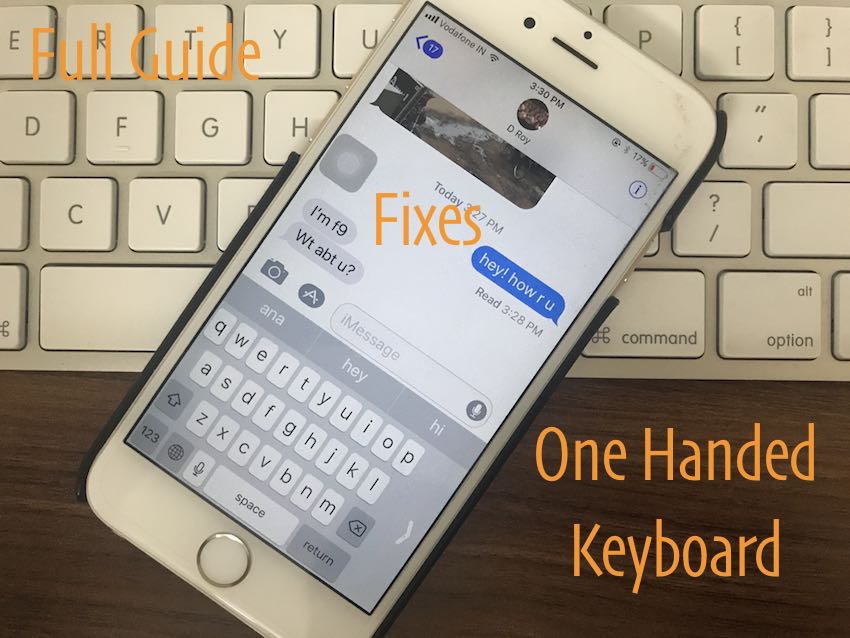
Make typing easy and Quick using One-Handed Keyboard mode on iPhone. Users also reported One-handed keyboard make iPhone screen freeze and unresponsive. Otherwise, it’s convenient virtual keyboard that set on screen depend on user’s wish. Also get quicker Fix on After enable Left/ Right handed keyboard is not working/ Missing or cannot use on compatible iPhone models.
The One-Handed mode in iOS 11 is an effortless way to start type text in Messages, Mail, Chat, Notes and more. Here are the troubleshooting steps for One-Handed Keyboard can’t Working on iOS 12.
Right now there are too many third-party one-handed keyboards on the app store but not facilitate like a suitable option given by Apple in iOS 11. Also useful settings for preventing or use the one-handed keyboard on iPhone, iPad using tiny fingers and hand.
A fantastic option for default keyboard quickly enables and convert layout on appropriate design. Let’s see how to use?
Steps for Enable/Turn on One Handed Keyboard on iPhone, iPad: iOS 12/iOS 11
Apple has added a one-handed keyboard option to the iPhone. There are two ways to activate it:
#1: By default this option always available on your keyboard.
#2: See, Long-press on the globe icon or Emoji icon on the keyboard, near to microphone icon. Next, you will see Keyboard position icon (Left, Right keyboard)
How to Permanently Delete History on iPhone or iPad 2018
At last, you will see Keyboard settings in a popup. Tap on it. And jump into Keyboard settings. See screen below,

See One Handed Keyboard > Tap on it and Change Keyboard Layout (Disabled for Turn off, Left and Right).
Disable/ Turn off one-handed keyboard pic center layout in keyboard settings pop-up.
Until you change this setting, it always sees in this handed mode. See Keyboard in full keyboard pane, Tap on Arrow icon, by repeat the same steps.
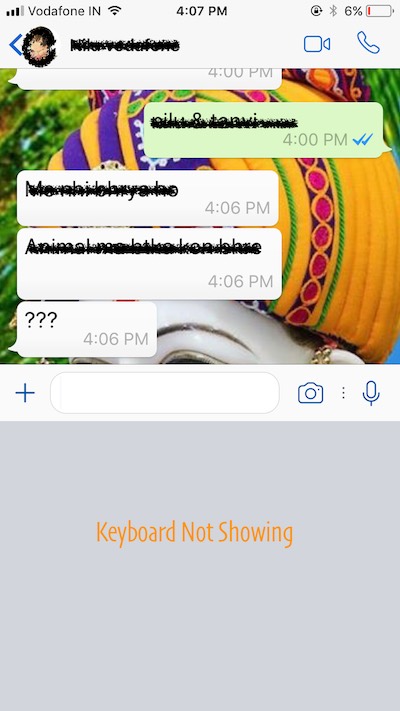
2nd Method: iPhone One-handed Keyboard not Showing or Disappeared
Important Solution!!!
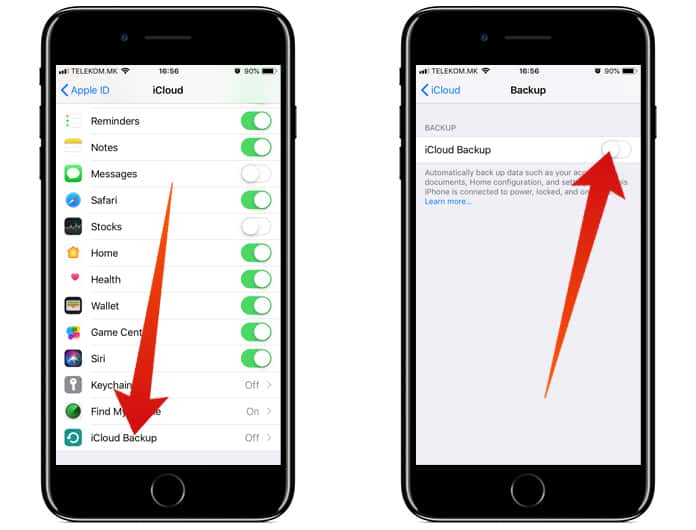
One Handed Keyboard mode required Display Zoom Off and Set Standard Display mode from the Settings app.
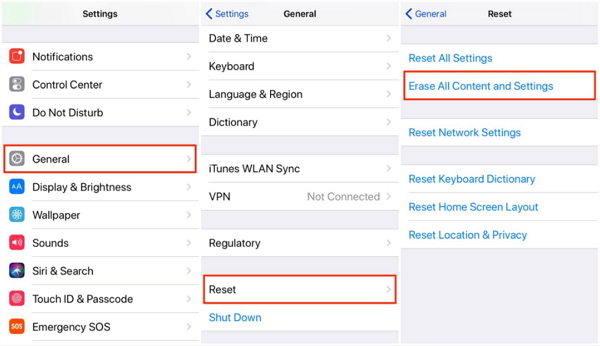
Go to the Settings app on iPhone
Display & Brightness > Scroll Down and Tap on View.

Select, Standard and Save. Changes may affect sleep your iPhone screen.
This happens because of large keyboard layout hide one-handed keyboard view, and the result is unable to activate (Left Handed or Right handed Mode, Two-Handed mode) or disappeared.
3rd Method: Using Settings App, Should not Disabled
Disable One-handed mode from Settings app.
Go to the Settings > General > Keyboard > One Handed Keyboard.
Sometimes, One-Handed keyboard not Showing under Text Replacement. So Follow the 2nd method. And check it again on below screen,
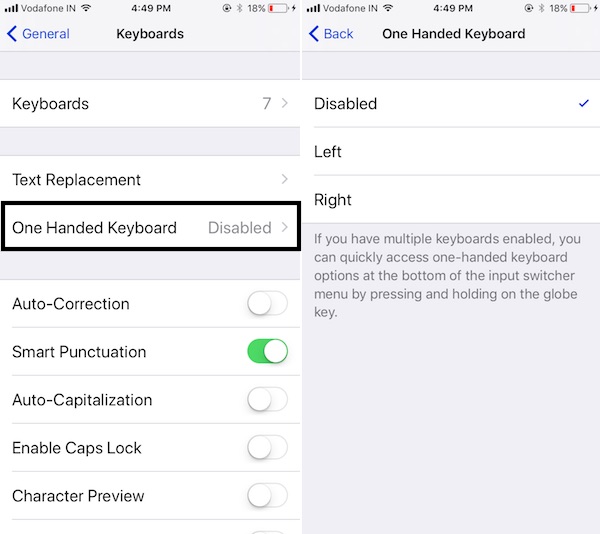
Select Disable.
Fixed: One Handed Keyboard not Activating, Freeze/Closing
#1: Restart or Reboot iPhone
Understandable suggestion some time helpful. By restart or Force Restart you make refresh your iDevice from a root and clear all problems related to memory, Interrupted process and more in a technical manner.
Restart: Press and Hold Sleep/ Wake button until you see the apple logo on the screen.You may also like:Gihosoft Mobile Transfer: 1 Click Data Transfer from Phone to Phone
Force Restart,
For iPhone X, iPhone 8 Plus, and iPhone 8 users:
1: Press and Quickly Release Volume Up button,
2: Press and Quickly Release Volume Down Button,
3: Press and Hold Side Button until you see the Apple logo on Screen.
To Start iPhone, Again press Side button until the startup Apple logo on the screen.
iPhone 7 or later users: Press Sleep Wake + Volume down button, until you see the apple logo on the screen.
iPhone 6S and Earlier users: Press Sleep Wake + Home button.
Also read: How to Unlock a Disabled iPhone Without iTunes.
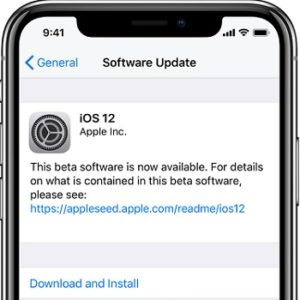
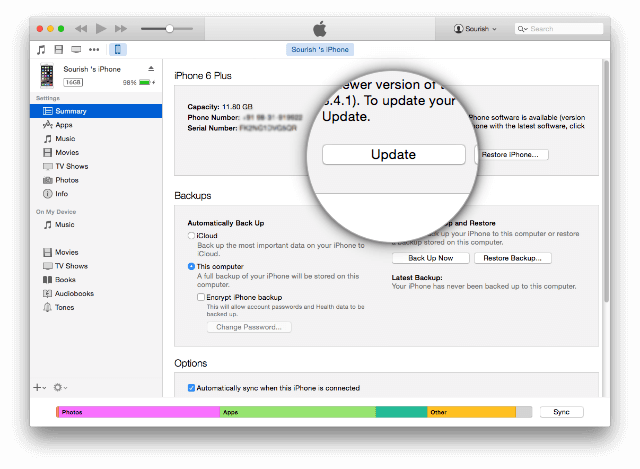
#2: Check for Update iOS
Fix out general fixes with new updates in iOS 12 from Apple. Check it from Settings > General > Software Update.
Hope you are using the one-handed keyboard without any trouble, Because it’s new and beneficial on big screen iPhone 6, 6 Plus, iPhone 7, 7 Plus and New iPhone 8/ iPhone 8 Plus/ iPhone X.
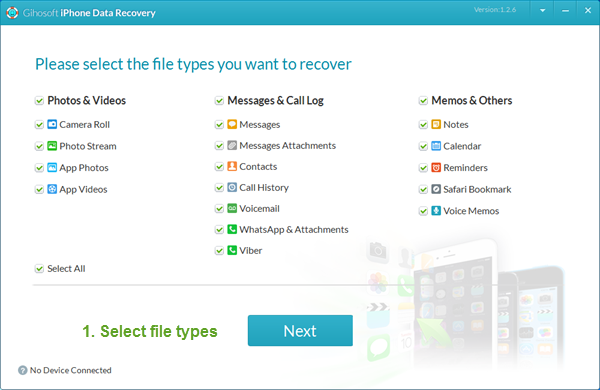
Free iTunes/iPhone Backup Extractor for iPhone, iPad
Jihosoft iTunes Backup Extractor is a powerful tool to recover and extract important data from iPhone, iPad & iPod touch backup on Windows or Mac.


 Jump To: